

Epoxy resin is a tough, plastic-like substance (polymer or prepolymer) that accommodates epoxide. Usually, the resin is combined with a hardener or healing which creates a chemical response and causes the combination to treatment or harden.
Epoxy resin will be purchased in all types of various crafting kits, in addition to utilized in bigger residence initiatives and even industrial initiatives. However for this submit, I’m primarily centered on resin artwork or craft initiatives that may be constituted of epoxy resin.
Resin artwork is any artwork or craft mission made with epoxy that’s coloured or has objects added to it (encased in it) and serves an aesthetic goal which may vary from a espresso desk to earrings.
We’ve shared LOTS of epoxy resin initiatives on this weblog over time, so I needed to place collectively a newbie’s information with all the data somebody may wish to get began.
Associated: On the lookout for extra DIY initiatives? Test our full crafts archive for years and years of nice craft initiatives.
Here’s a video on the right way to use epoxy resin:
Provides
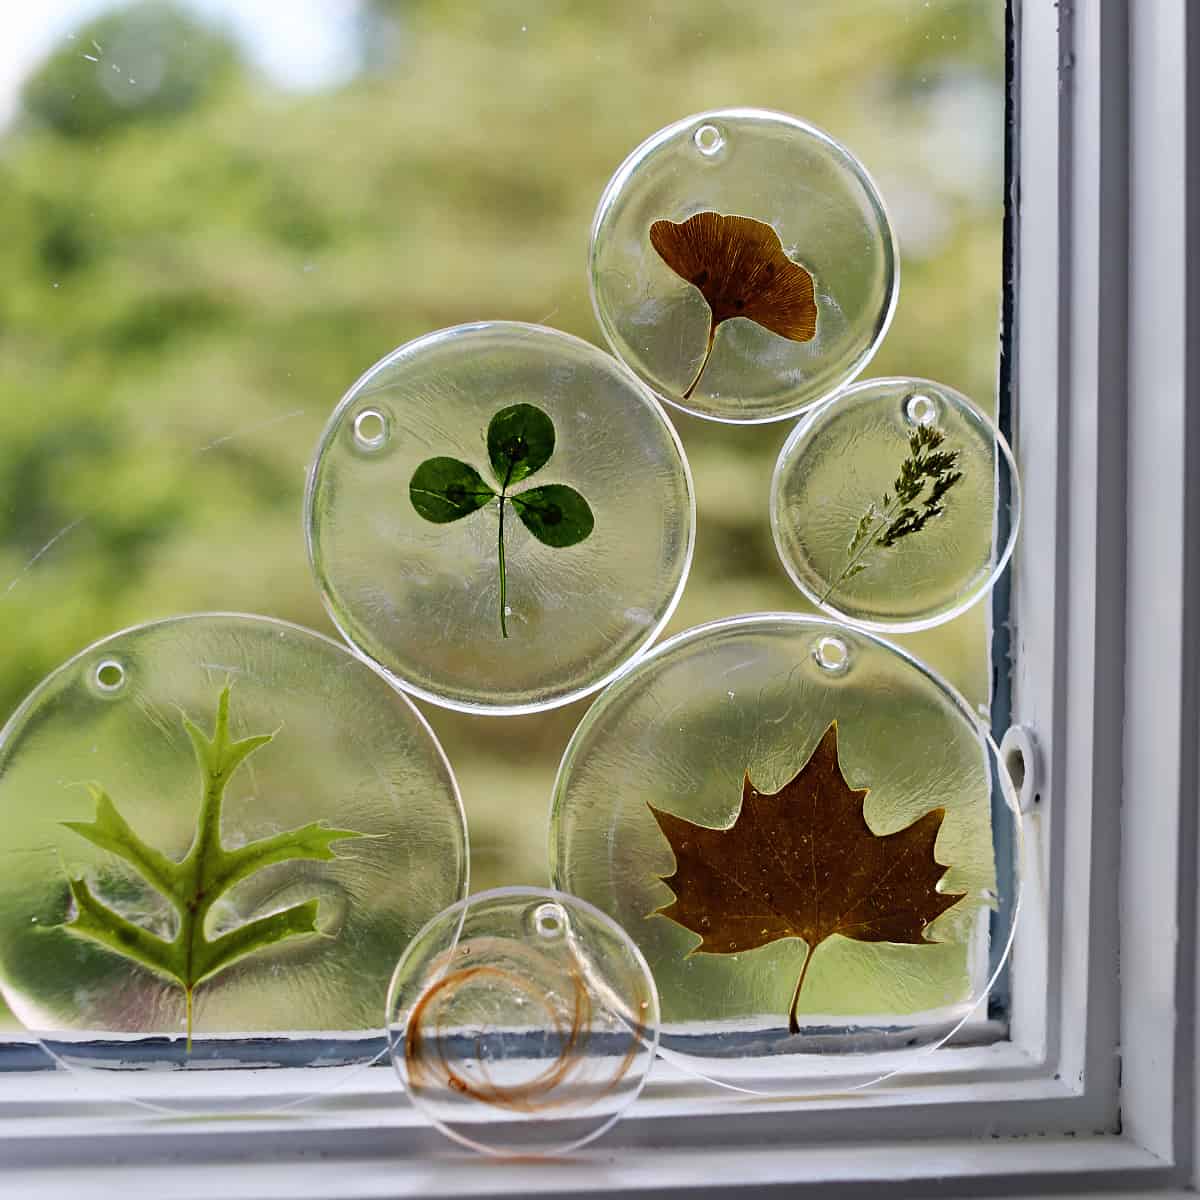
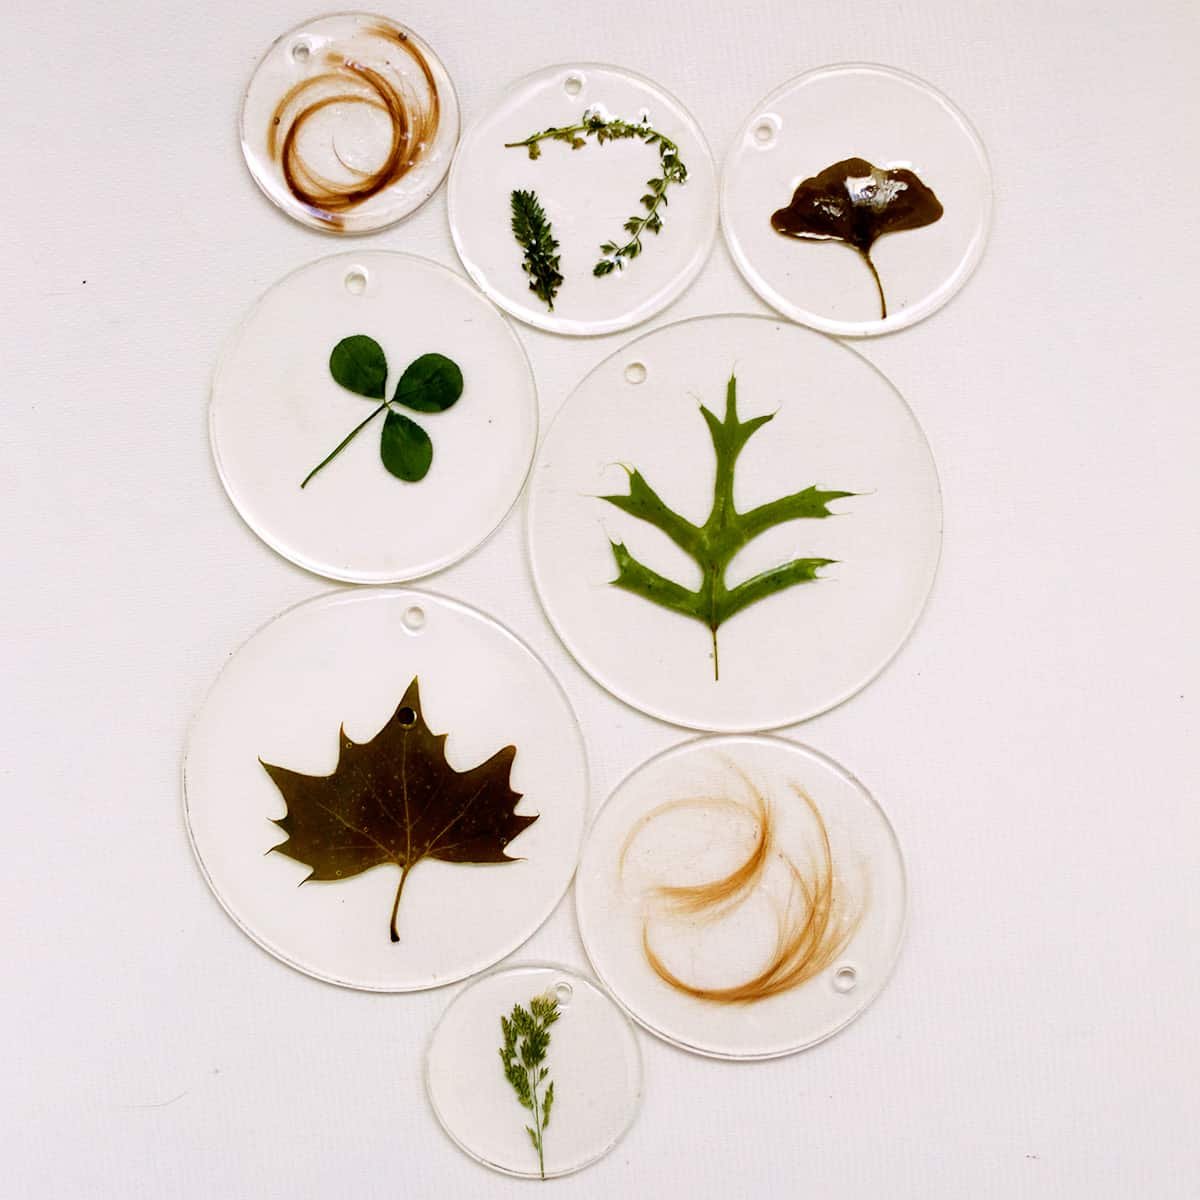
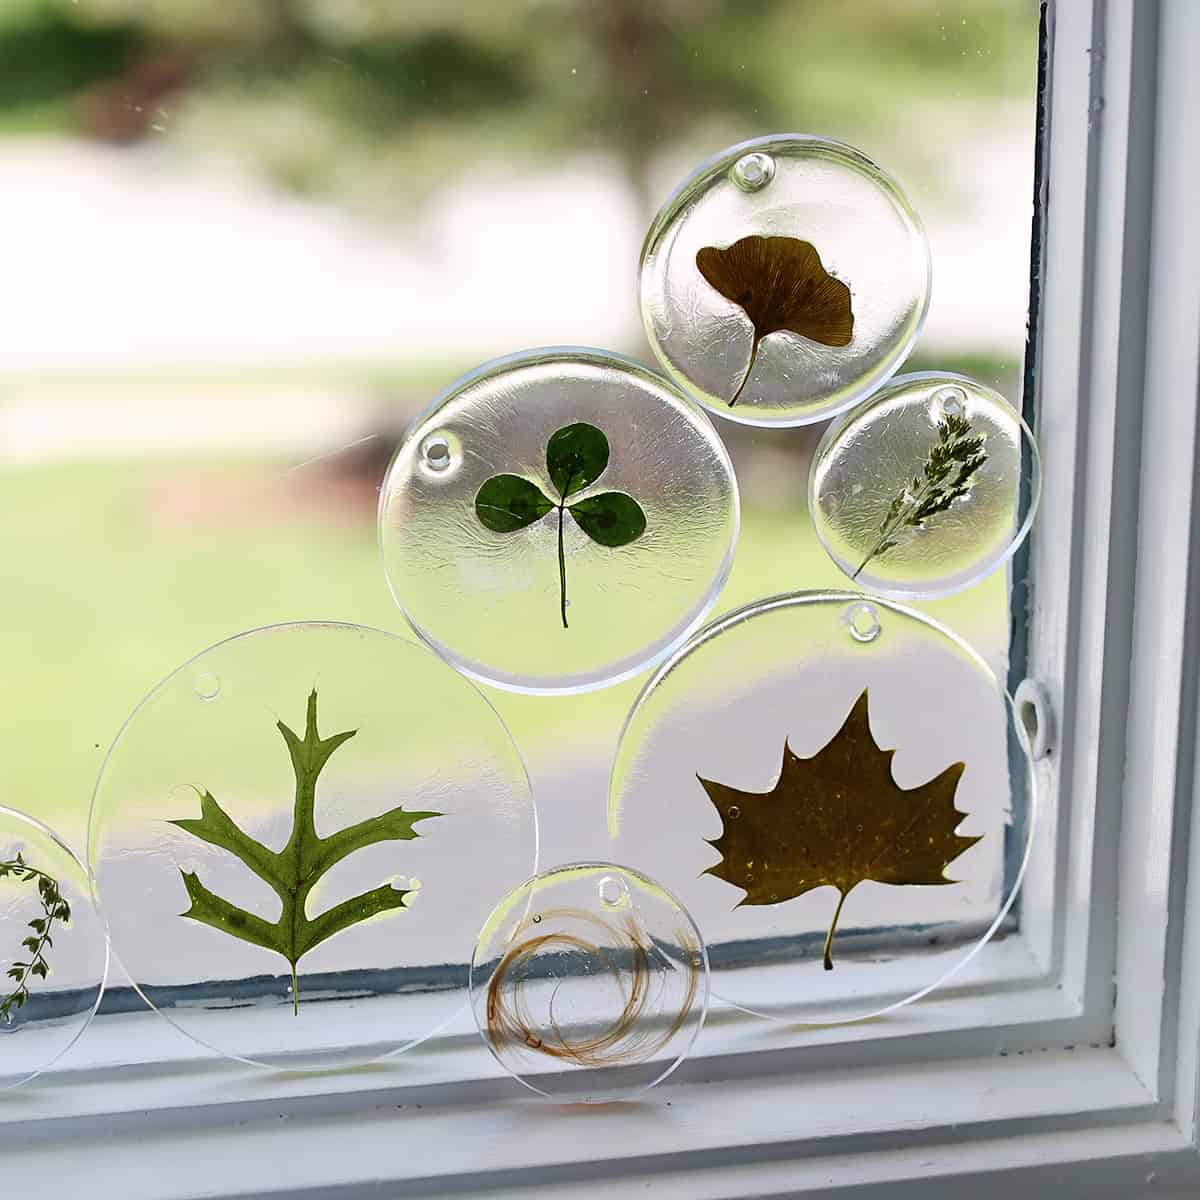
I additionally used some hair from my son’s first haircut for this mission. I needed to avoid wasting of his first locks in a Christmas decoration as a souvenir.
Finest Epoxy Resin Merchandise for Crafting
- Jewellery/Small Challenge Equipment – we’ve purchased this so many instances over time! It’s simple to make use of and comes with all of the fundamentals you’ll want apart from molds.
- Bigger Challenge Equipment – for many who wish to make numerous small initiatives or one thing bigger like a espresso desk or desk floor.
- Coaster molds – this set additionally comes with a coaster storage field mildew.
- Jewellery molds – for jewellery molds, I favor ones that embody a gap for including a bounce ring or different jewellery ending.
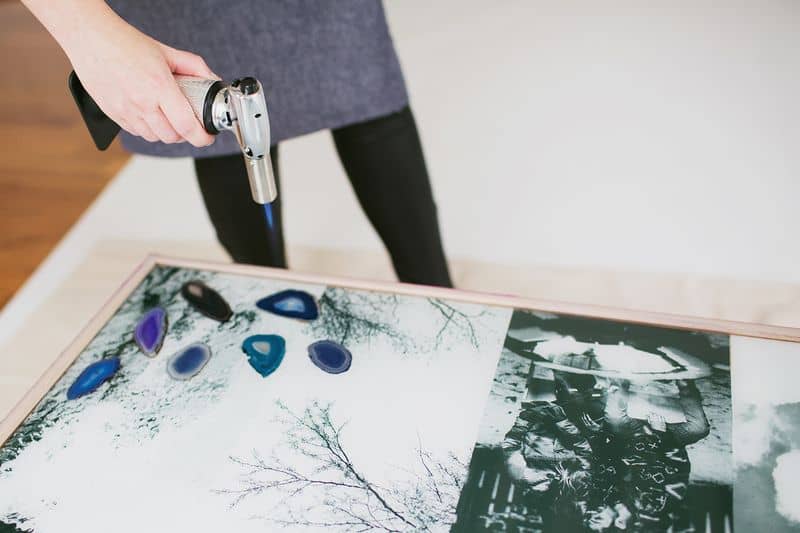
- Kitchen torch – nice for getting bubbles out, particularly for bigger items. Additionally you should utilize this for creme brûlée.
How you can Use Epoxy Resin
- Put together your work space and molds. You wish to ensure that the molds are clear and you’ve got protected any work surfaces in case of provides.
- Combine collectively the epoxy resin and hardener. Most kits can have you measure 1:1, however examine the instructions in your resin merchandise to ensure.
- Add the weather and fill the molds with the resin combination.
- Use toothpicks to rearrange or push parts into the resin extra. You may generally additionally pop any bubbles that type in your resin with the toothpicks.
- Permit the mission to completely treatment; normally this takes 10-24 hours relying in your resin product, so examine the directions.
- Take away your objects from their molds. You may additional embellish, like including ribbon to the ornaments, and many others.

Epoxy Resin Initiatives
- DIY Epoxy Resin Espresso Desk – I sealed pictures and agate slices, however you might do pennies if you need that basic look
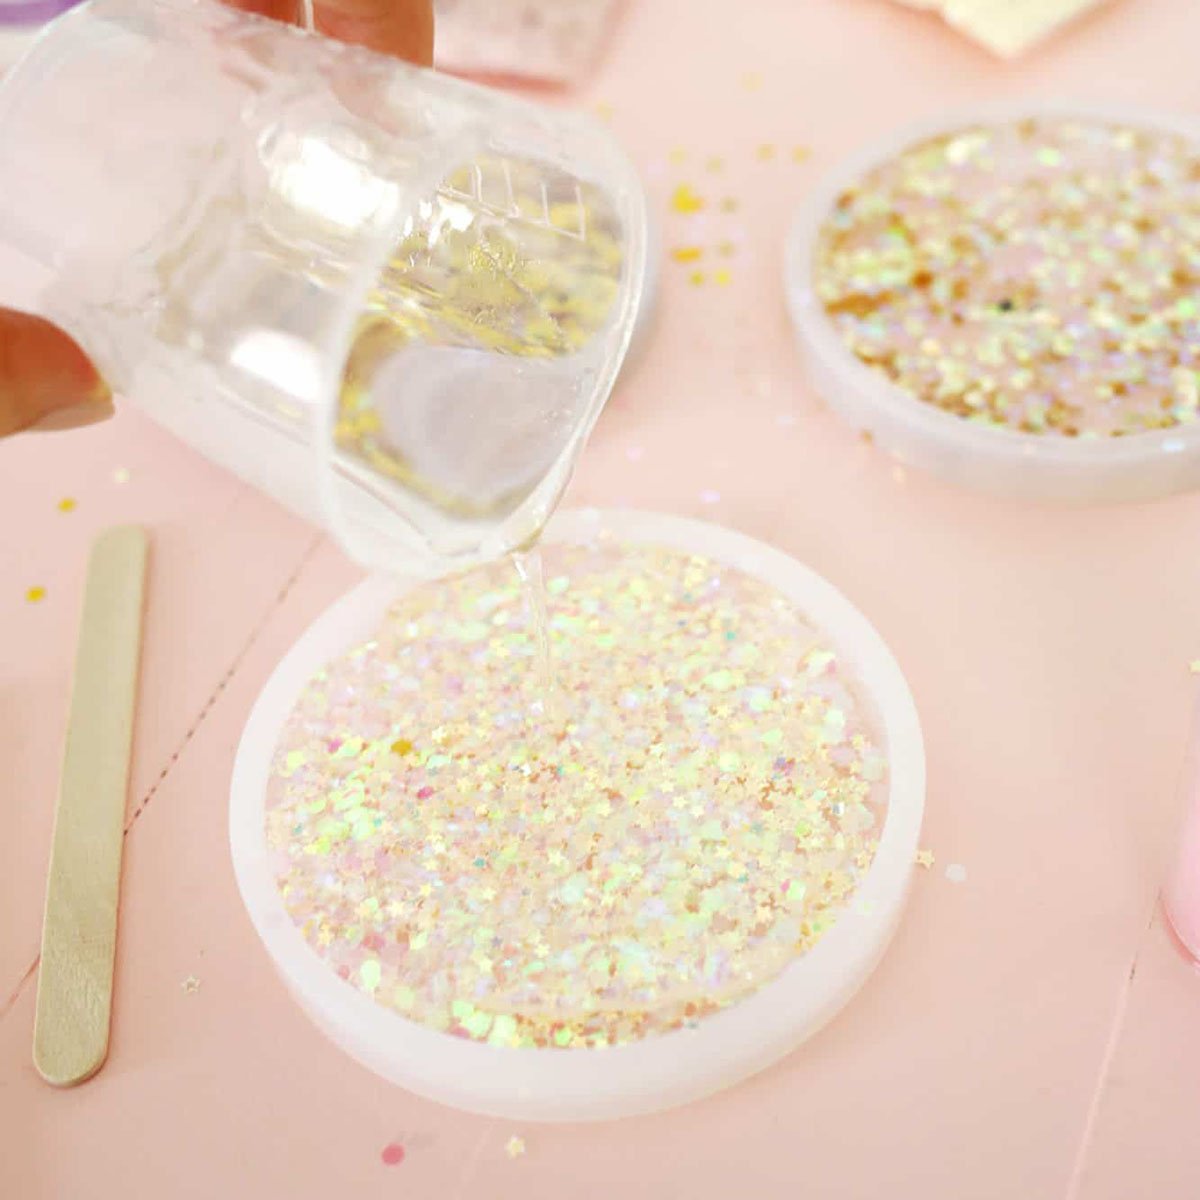
- Glitter Coasters
- DIY Fake Terrazzo Counter tops – a bigger scale mission with an epoxy resin seal
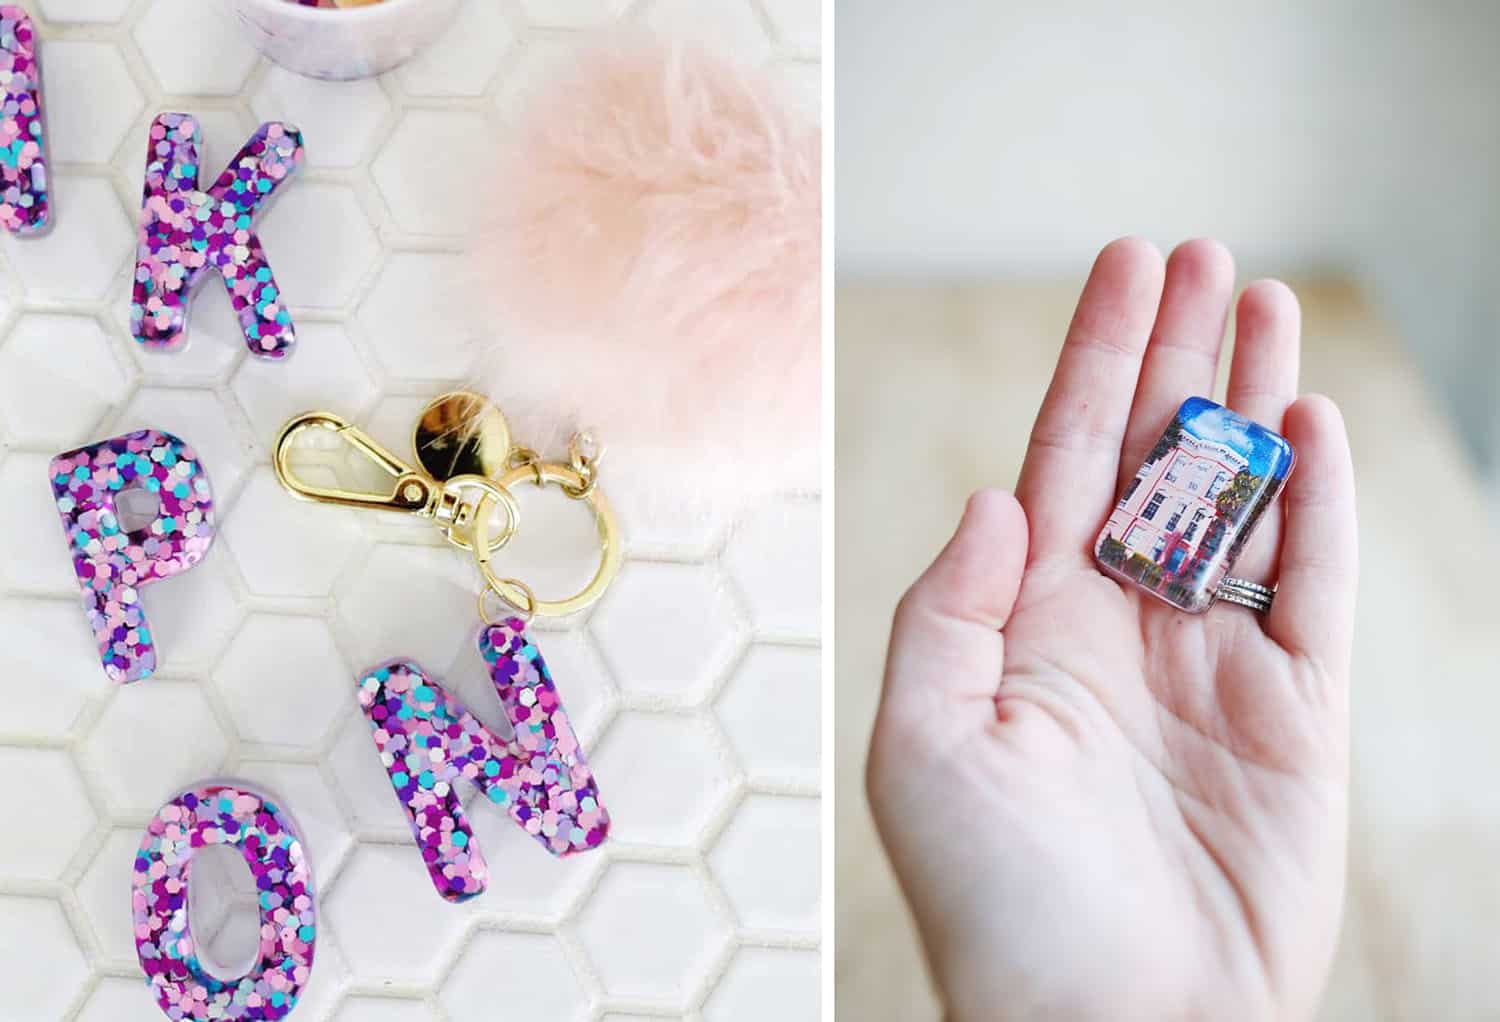
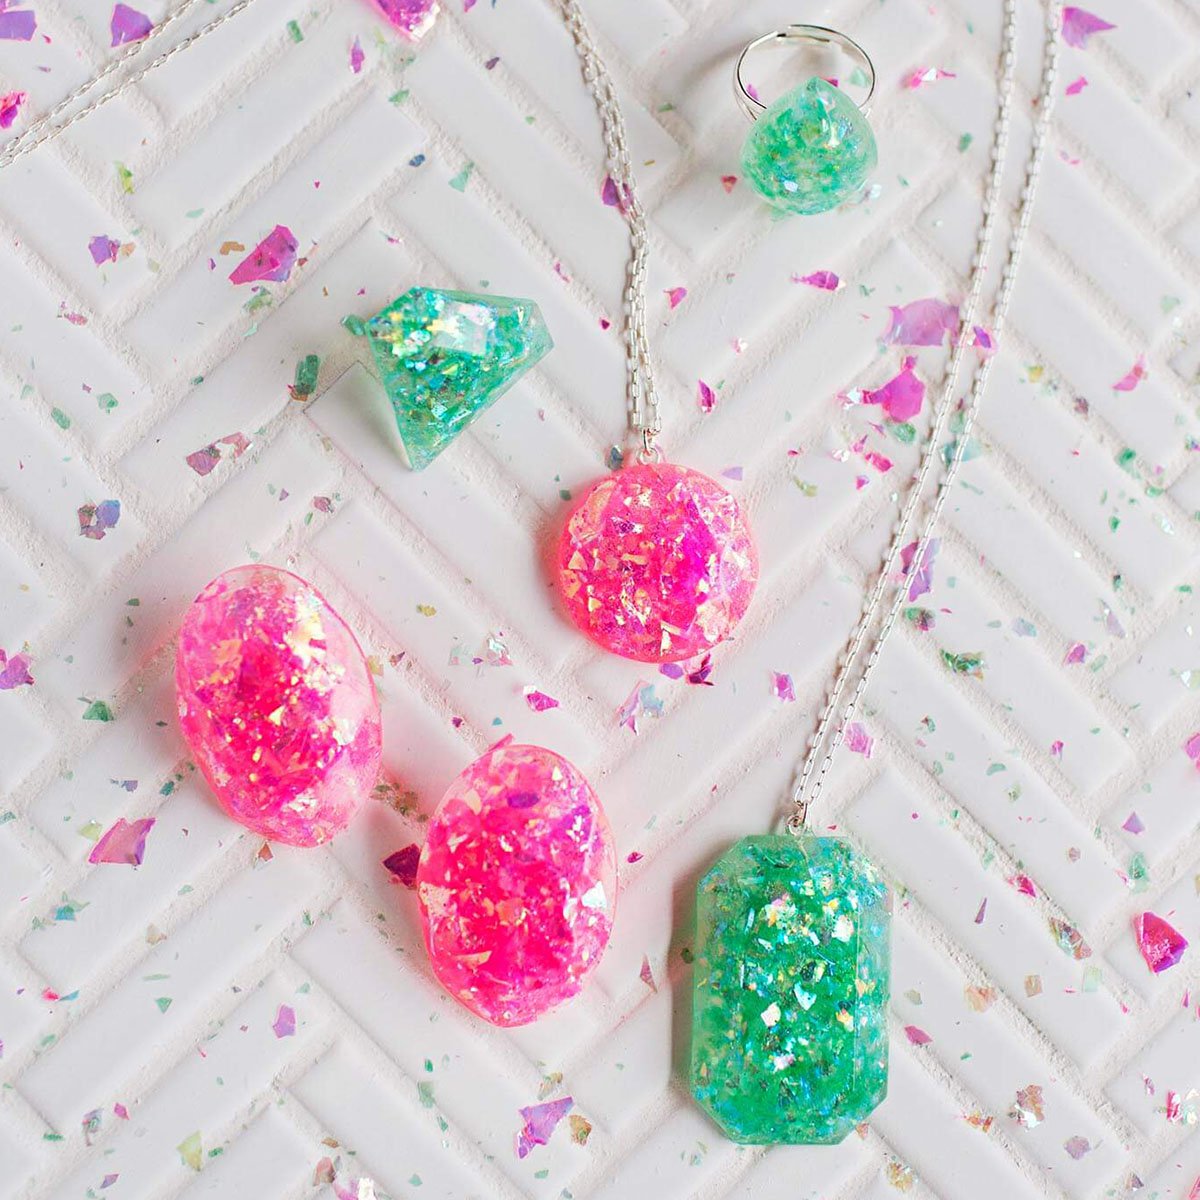
- DIY Epoxy Resin Jewellery – with glitter and sprinkles
- Colourful Epoxy-Topped Desk
- Epoxy Jewellery Field – a enjoyable present concept
- Alcohol Ink Resin Coasters – so enjoyable and colourful!
- Daisy DIY Earrings
- Glitter Letter Keychain
- Epoxy Assertion Necklace – with pictures
What are the Completely different Kinds of Resin?
- Epoxy – The most effective object for craft and smaller residence initiatives, particularly for rookies. It has a low odor. As soon as combined, you’ll have a brief period of time to solid your items (normally 20 minutes or much less) and the epoxy normally cures inside 24 hours.
- Polyester – Greater odor however cures very arduous. An excellent possibility if you need one thing that cures arduous sufficient you could sand it.
- Polyurethane – Extra delicate however cures in a short time. If you would like a resin that cures (hardens) quick, that is the most suitable choice.
Suggestions for Success
- Put together work items – have the whole lot able to go earlier than you combine your resin.
- Put together work house – cowl surfaces with scrap paper or a drop material and ensure your molds or different provides are mud and particles free; in any other case, the mud might get caught in your resin without end.
- Put on gloves and take into account protecting eyewear, particularly in case you’re working with bigger items. You may additionally wish to work in a nicely ventilated space or outside, however have a option to cowl or shield your mission because it cures from climate.
- A warmth gun or kitchen torch is one of the simplest ways to take away bubbles from bigger surfaces. In case your mission is smaller, like jewellery items, you should utilize a toothpick to take away bubbles.
Ceaselessly Requested Questions
Is resin artwork costly?
Probably not. Resin artwork will be comparatively cheap, particularly in case you are engaged on smaller initiatives like coasters or jewellery. Bigger initiatives that require extra epoxy resin and different provides might turn into costlier.
Is resin artwork troublesome?
No, anybody can have success with resin artwork initiatives. If you’re engaged on a resin artwork mission with kids although, take care they’re totally supervised as there are chemical substances concerned.
Are you able to paint on epoxy resin?
Sure. Most epoxy resin will be painted after it cures, though there are totally different varieties, so examine your product description. It’s also possible to tint the resin with paint.
What questions do you could have about resin artwork? What initiatives are you going to strive?
Love this submit? Join our e-newsletter for extra concepts!

Get inventive concepts for recipes, crafts, decor, and extra in your inbox!

Get the How-To
the right way to create ornaments or coasters with epoxy resin
Directions
-
Put together your work space and molds. You wish to ensure that the molds are clear and you’ve got protected any work surfaces in case of provides.
-
Combine collectively the epoxy resin and hardener. Most kits can have you measure 1:1, however examine the instructions in your resin merchandise to ensure.
-
Add the weather and fill the molds with the resin combination.
-
Use toothpicks to rearrange or push parts into the resin extra. You may generally additionally pop any bubbles that type in your resin with the toothpicks.
-
Permit the mission to completely treatment; normally this takes 10-24 hours relying in your resin product, so examine the directions.
-
Take away your objects from their molds. You may additional embellish, like including ribbon to the ornaments, and many others.
Notes
- I additionally used some hair from my son’s first haircut for this mission. I needed to avoid wasting of his first locks in a Christmas decoration as a souvenir.