
Whether or not you’re making a traditional cheesecake, or a flavorful variation like lemon cheesecake, amaretto cheesecake, or pecan pie cheesecake, it’s useful to know the what, why, and the way of baking a cheesecake in a water bathtub. For picture-perfect, tall, and easy cheesecake, you don’t need to skip this crucial step. Use my video tutorial as a information.
What Is a Cheesecake Water Bathtub?
Baking your cheesecake in a water bathtub is one of the best ways to make sure cheesecake success. Don’t fear—you don’t have to purchase any particular tools or a elaborate bathtub-size baking equipment! It merely means inserting the springform pan with the unbaked cheesecake in it inside a bigger pan with sizzling water in it.
Why Ought to I Bake Cheesecake in a Water Bathtub?
We’re primarily including steam to the baking and cooling steps. Why can we do that? Is it as a result of it is a high-maintenance dessert that calls for a spa therapy? Effectively, truly, type of!
Cheesecake loves a damp setting, and we need to give it the very best probability of baking up easy, creamy, tall, and crack-free. Right here’s why:
- Cheesecakes Are Egg-Heavy: Eggs want a moist and humid setting to correctly rise and keep away from drying out or burning.
- Forestall Cracks within the Floor: The steam from the new water will elevate the cheesecake up slowly and evenly, lowering the danger of cracks on the floor. You possibly can learn extra about this on this publish on Learn how to Forestall Cracks in Cheesecake.
- Forestall Sinking: Beginning the cooling course of within the oven, nonetheless within the water bathtub, makes for a gradual and even cool-down, which helps stop the cheesecake from sinking again down because it cools. Cheesecakes should not followers of sudden temperature modifications. (Chocolate soufflé is… they prefer to sink!)
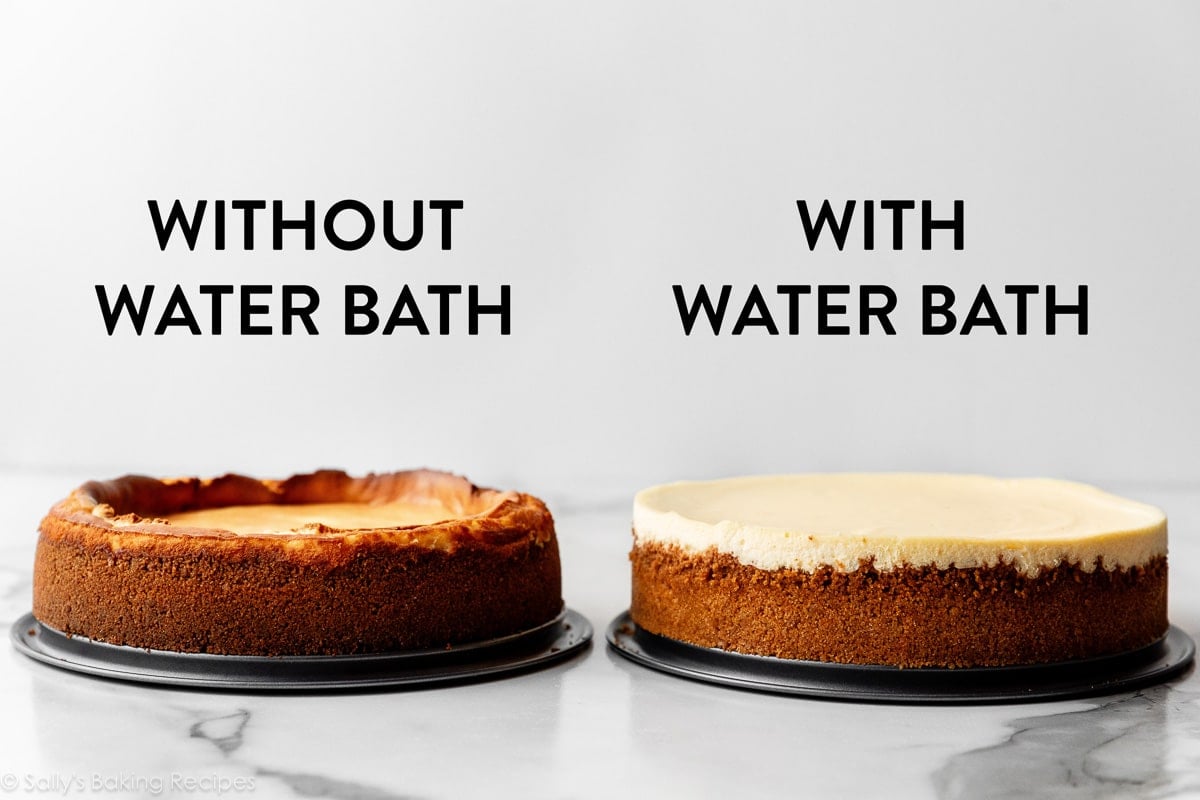
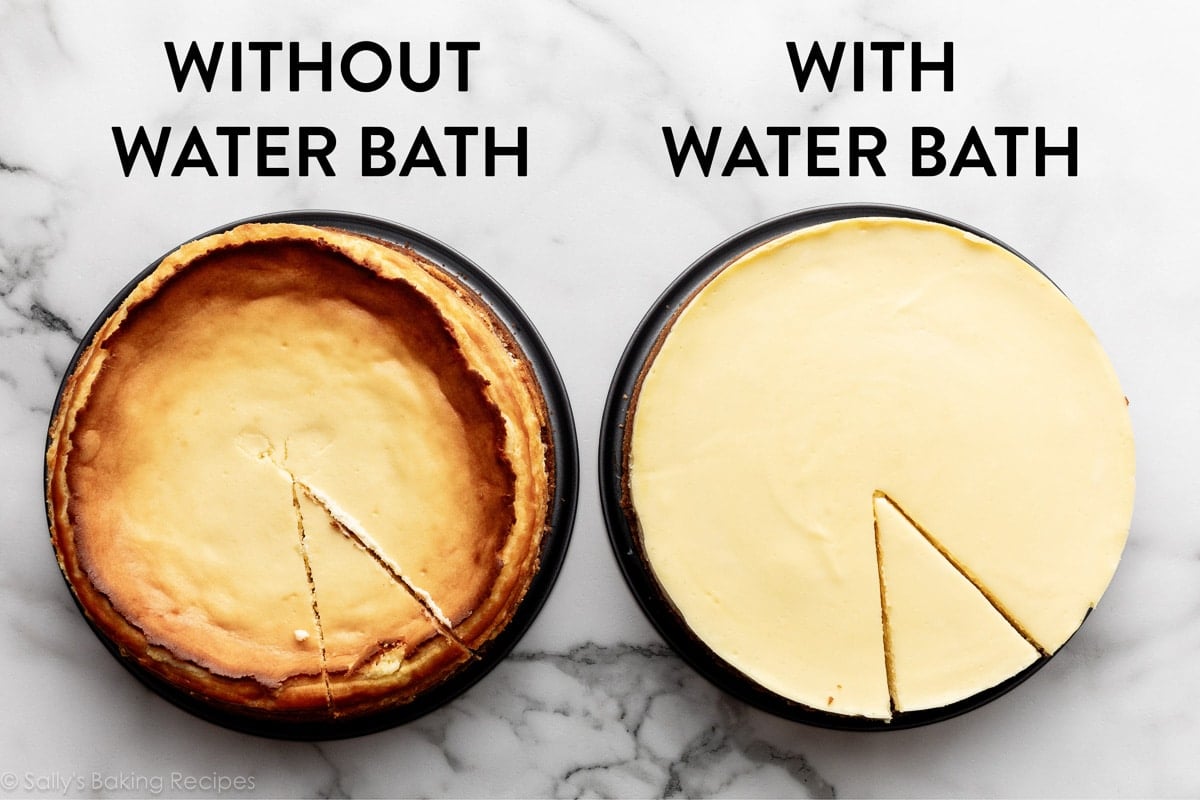
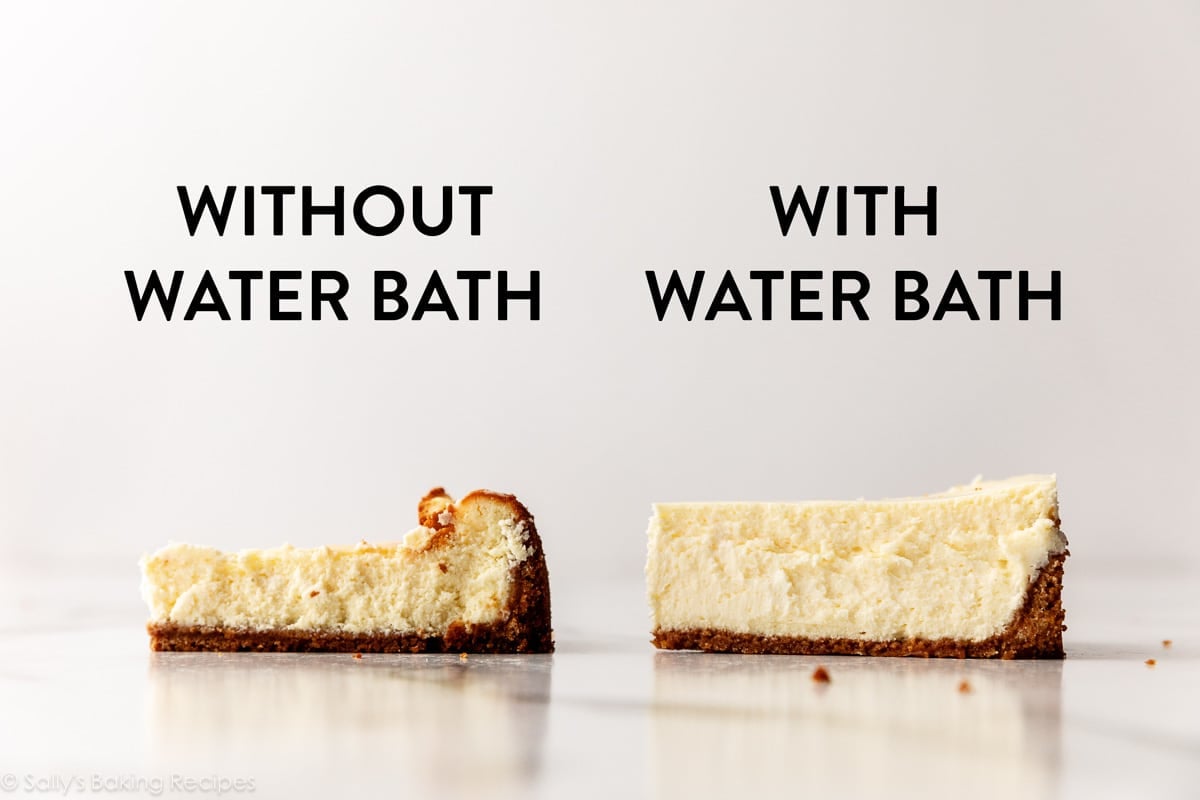
Take a look at the images beneath. As you may see, taking a number of further minutes to arrange a water bathtub in your cheesecake is nicely price it. Have a look at these variations, utilizing the identical actual cheesecake recipe.
I’m going to stroll you thru 2 completely different strategies for baking a cheesecake in a water bathtub.
1. Learn how to Make a Conventional Water Bathtub
Right here’s what you want:
- High quality springform pan (I take advantage of and love this one)
- Aluminum foil (I like to recommend heavy obligation)
- Massive roasting pan
- Boiling water (I take advantage of a kettle to make pouring simpler)
And right here’s how you can do it:
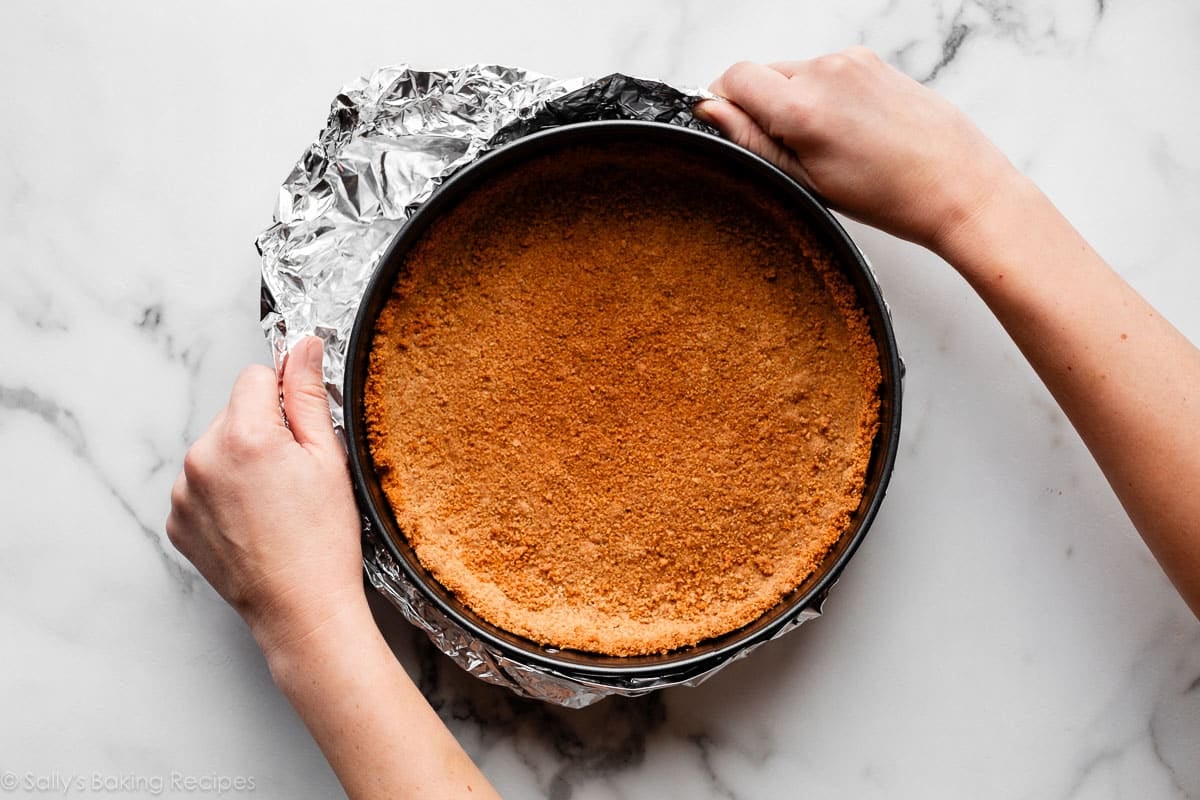
- Tear or reduce two items of foil and lay one on prime of the opposite. After you’ve formed your crust inside (and pre-baked the crust, in case your cheesecake recipe requires this step), place the springform pan on the double-layer sheet of foil. Fold up the edges of the foil, tightly wrapping the outside of the cheesecake pan on the underside and up the edges. Should you pre-baked the crust, be further cautious if the pan continues to be sizzling! This foil wrap prevents water from seeping in by means of your springform pan.
- Boil water. You want sufficient to fill your massive pan with about an inch of water, so I often boil a full kettle.
- Place the foil-wrapped springform pan inside your massive roasting pan. Pour and unfold your cheesecake batter into the ready crust. Place the roasting pan on the center or lower-middle rack in your preheated oven. (You can even pour the boiling water into the roasting pan exterior of the oven, and punctiliously switch the pan to the oven.)
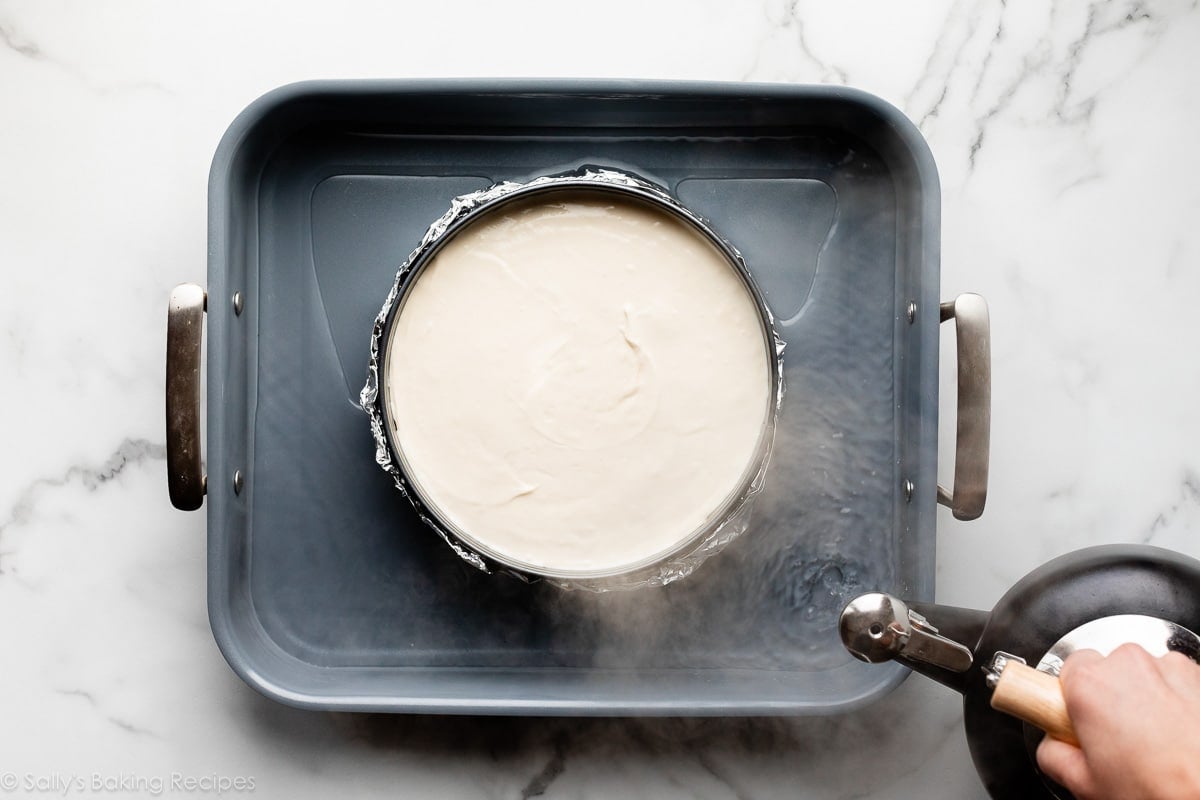
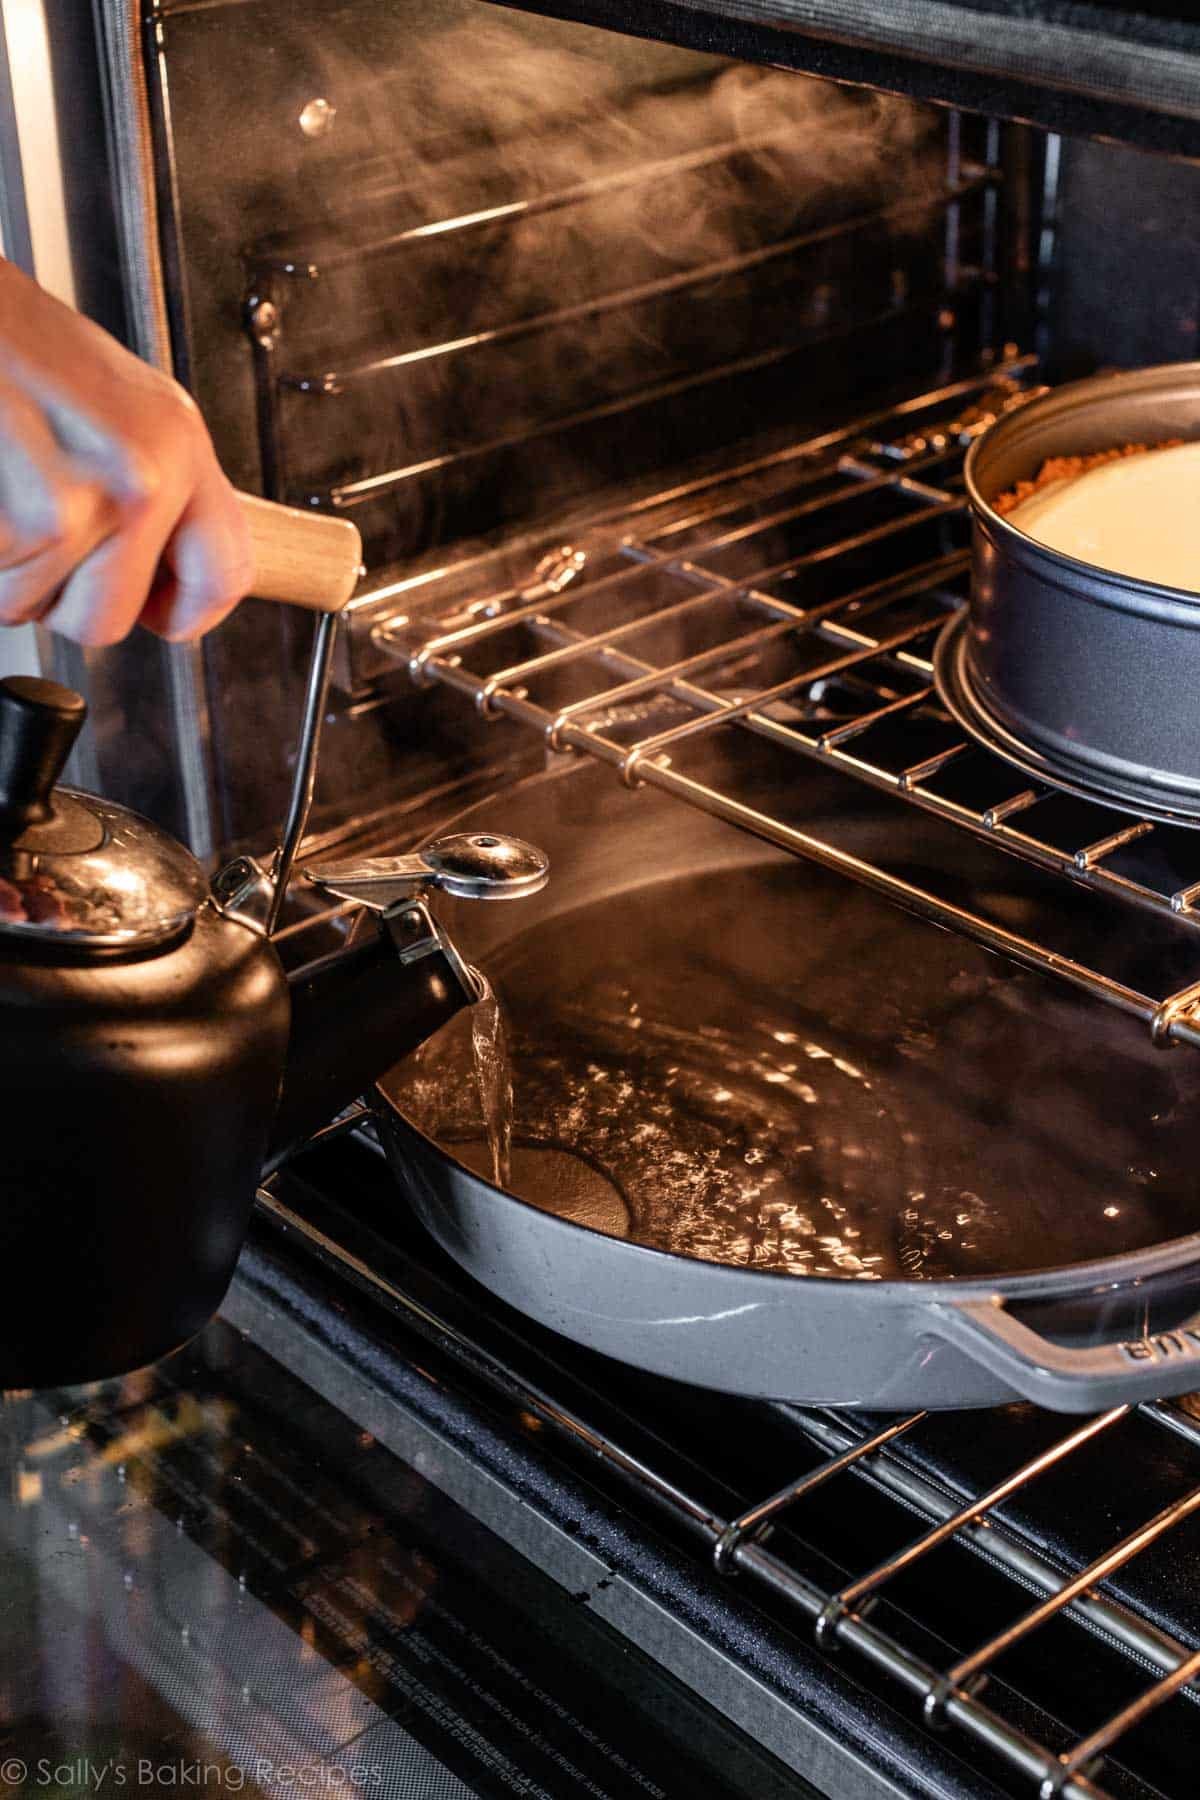
- Working rapidly however rigorously, pour sizzling water into the roasting pan, in order that the wrapped springform pan is surrounded by sizzling water, about 1 inch deep. I often fill with water as soon as positioned within the oven to bake as a result of it’s arduous to switch a water-filled roasting pan with a cheesecake inside it into the oven. However, once more, you are able to do it both method!
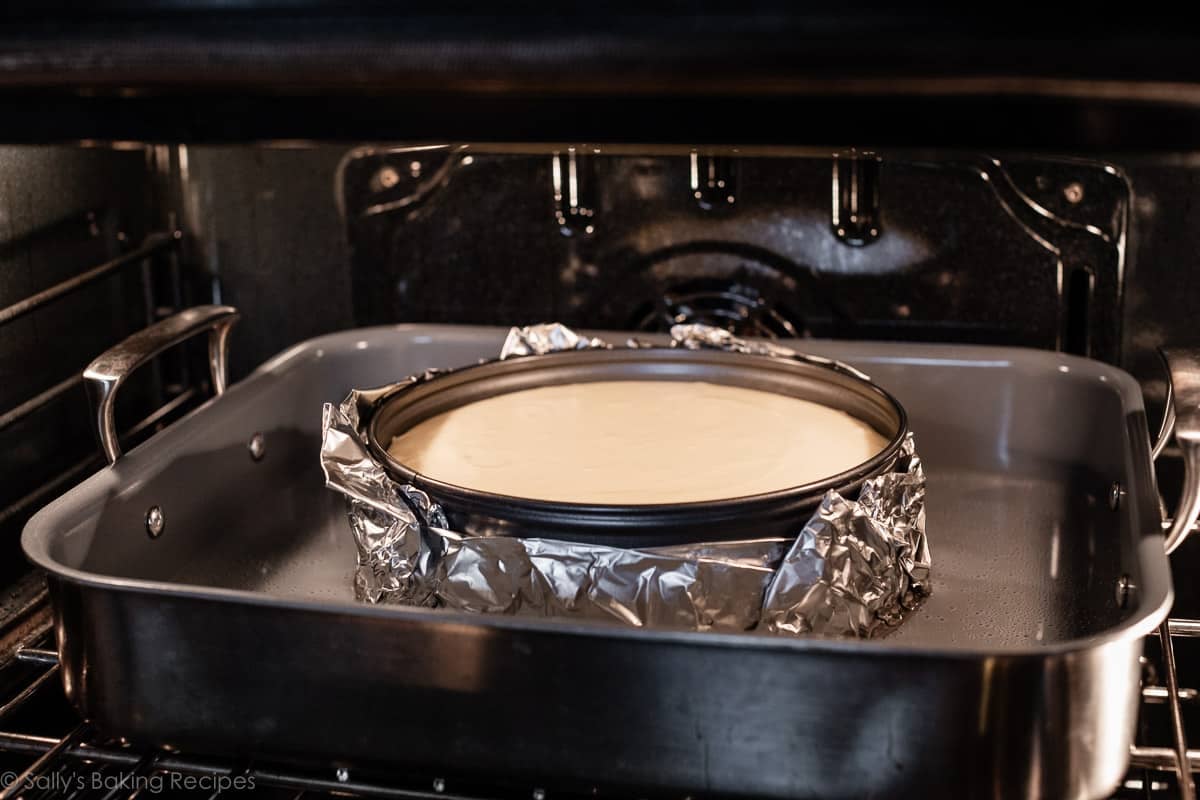
- Rapidly shut the oven door, and bake the cheesecake.
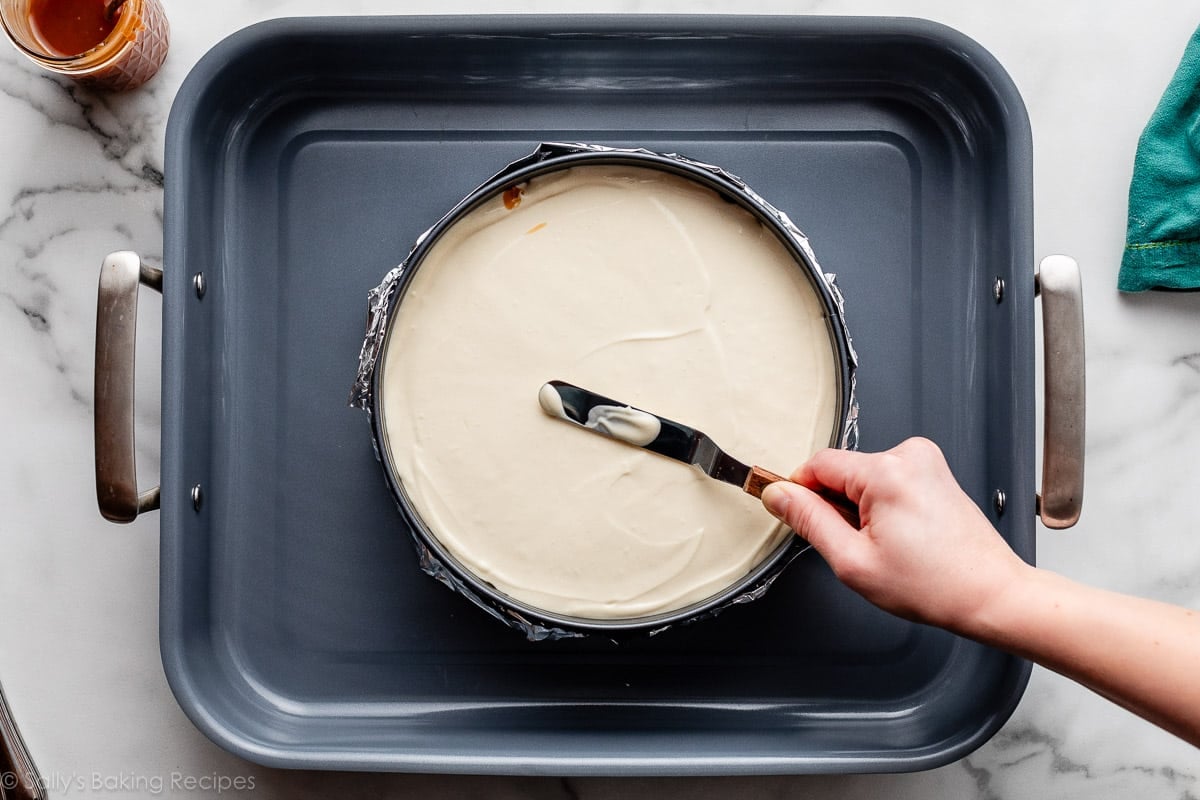
Like I discussed, you may both place the roasting pan (with the cheesecake in it) within the oven now, after which pour within the boiling water, OR you may pour the boiling water within the roasting pan and switch it to the oven. I took this following photograph exterior of the oven simply to indicate you this step. In my video beneath, I do that whereas the pan is IN the oven. Once more, both method is ok.
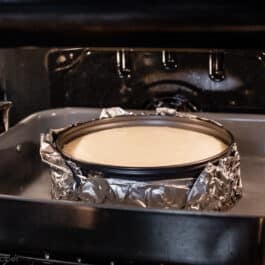
2. Alternate Choice
Should you don’t need to threat water leaking into your springform pan, I’ve an alternate water bathtub methodology that works splendidly. You continue to want a big oven-safe pan, however it would go on a backside rack of the oven, beneath the rack the cheesecake is on.
Right here’s what you want:
- High quality springform pan (I take advantage of and love this one)
- Massive oven-safe pan, reminiscent of a roasting pan, cast-iron skillet, or 9×13-inch steel baking pan (not glass)
- Boiling water (I take advantage of a kettle to make pouring simpler)
And right here’s how you can do it:
- Boil water. You want sufficient to fill your massive pan with about an inch of water, so I often boil a full kettle.
- Place your cheesecake on the center oven rack.
- Instantly place the big oven-safe pan you’re utilizing on the underside oven rack.
- Pour sizzling water into the empty pan on the underside rack, in order that it’s about 1 inch deep.
- Rapidly shut the oven door, and bake the cheesecake.
This distinctive water bathtub provides steam to the oven with out having the cheesecake sit contained in the water itself. This methodology will also be used so as to add steam to baking artisan bread, for a crispier crust.
Cooling the Cheesecake within the Water Bathtub
When your cheesecake is finished baking (the sides are set however the middle nonetheless jiggles barely should you faucet the pan), don’t take it out of the oven. Flip the oven off and crack open the oven door in order that some steam can escape. Let the cheesecake quiet down slowly within the oven with the door barely ajar for a minimum of an hour, with the water bathtub (both methodology you used) nonetheless within the oven as nicely, so it stays in that humid setting whereas it cools step by step.
After about an hour, take away the cheesecake from the oven. Then let it cool fully on a wire rack, earlier than transferring it to the fridge to sit back, per your recipe directions.
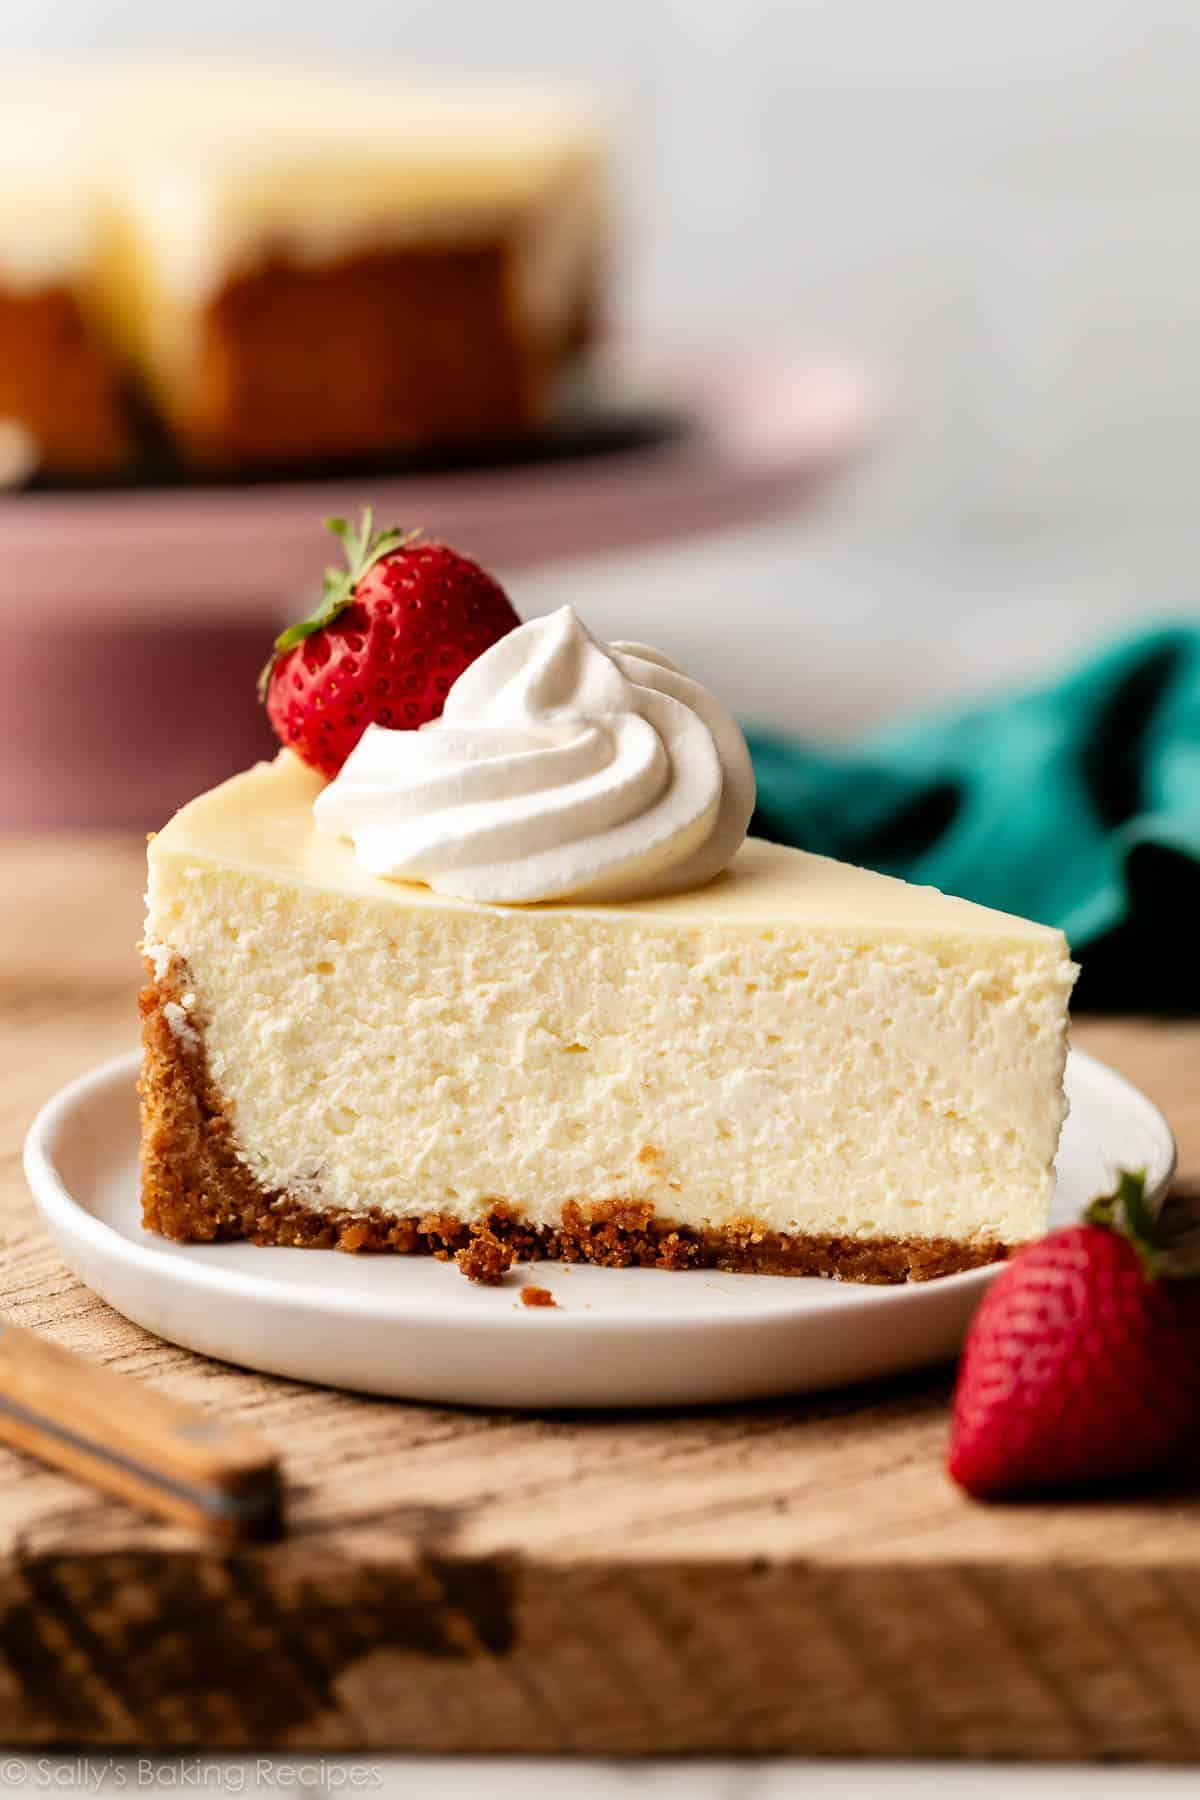
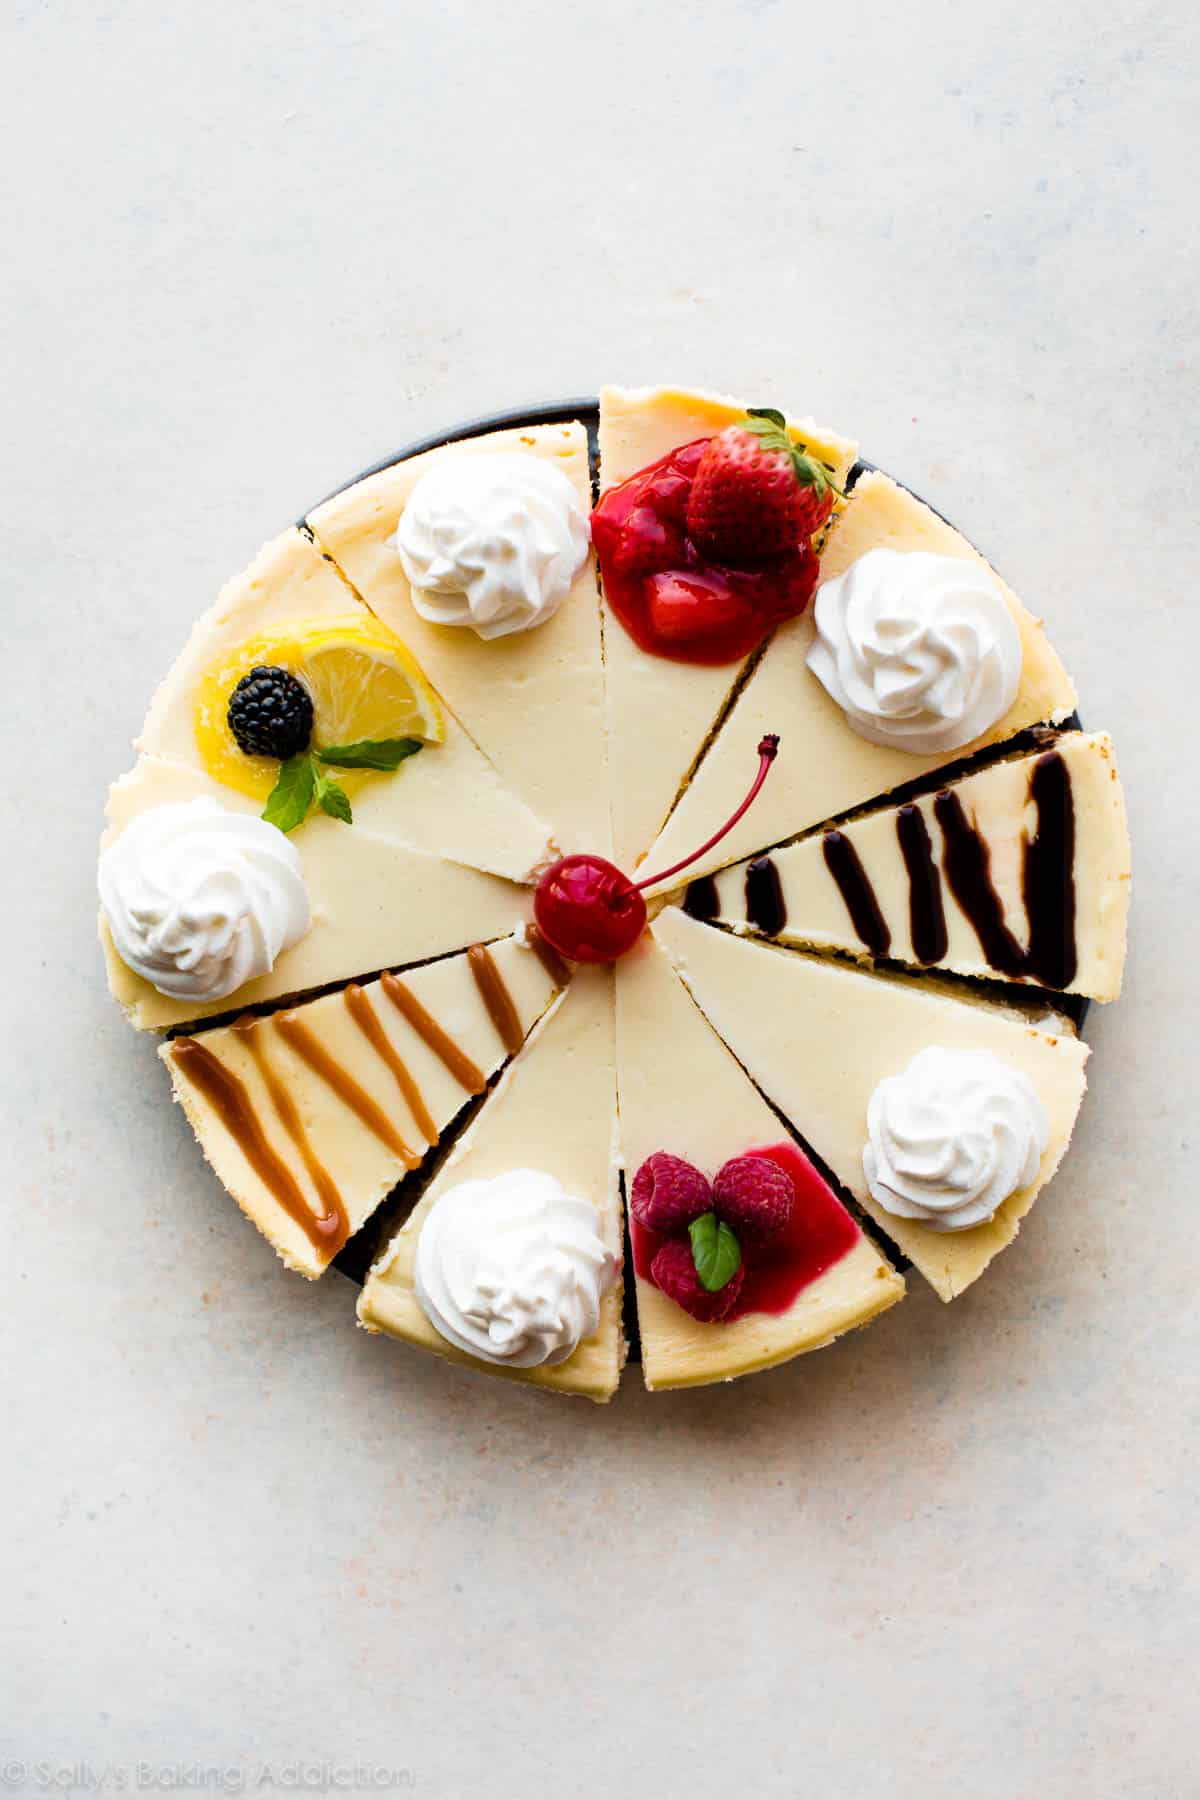
In case your cheesecake continues to be displaying a number of cracks, there’s an answer for that! Whipped cream or a sauce—like salted caramel, strawberry sauce, raspberry sauce, or blueberry sauce—can cowl up even the craggiest cheesecake floor. Or unfold on a layer of chocolate ganache or lemon curd, no matter taste goes greatest together with your cheesecake.
I cowl this pumpkin swirl cheesecake with whipped cream:
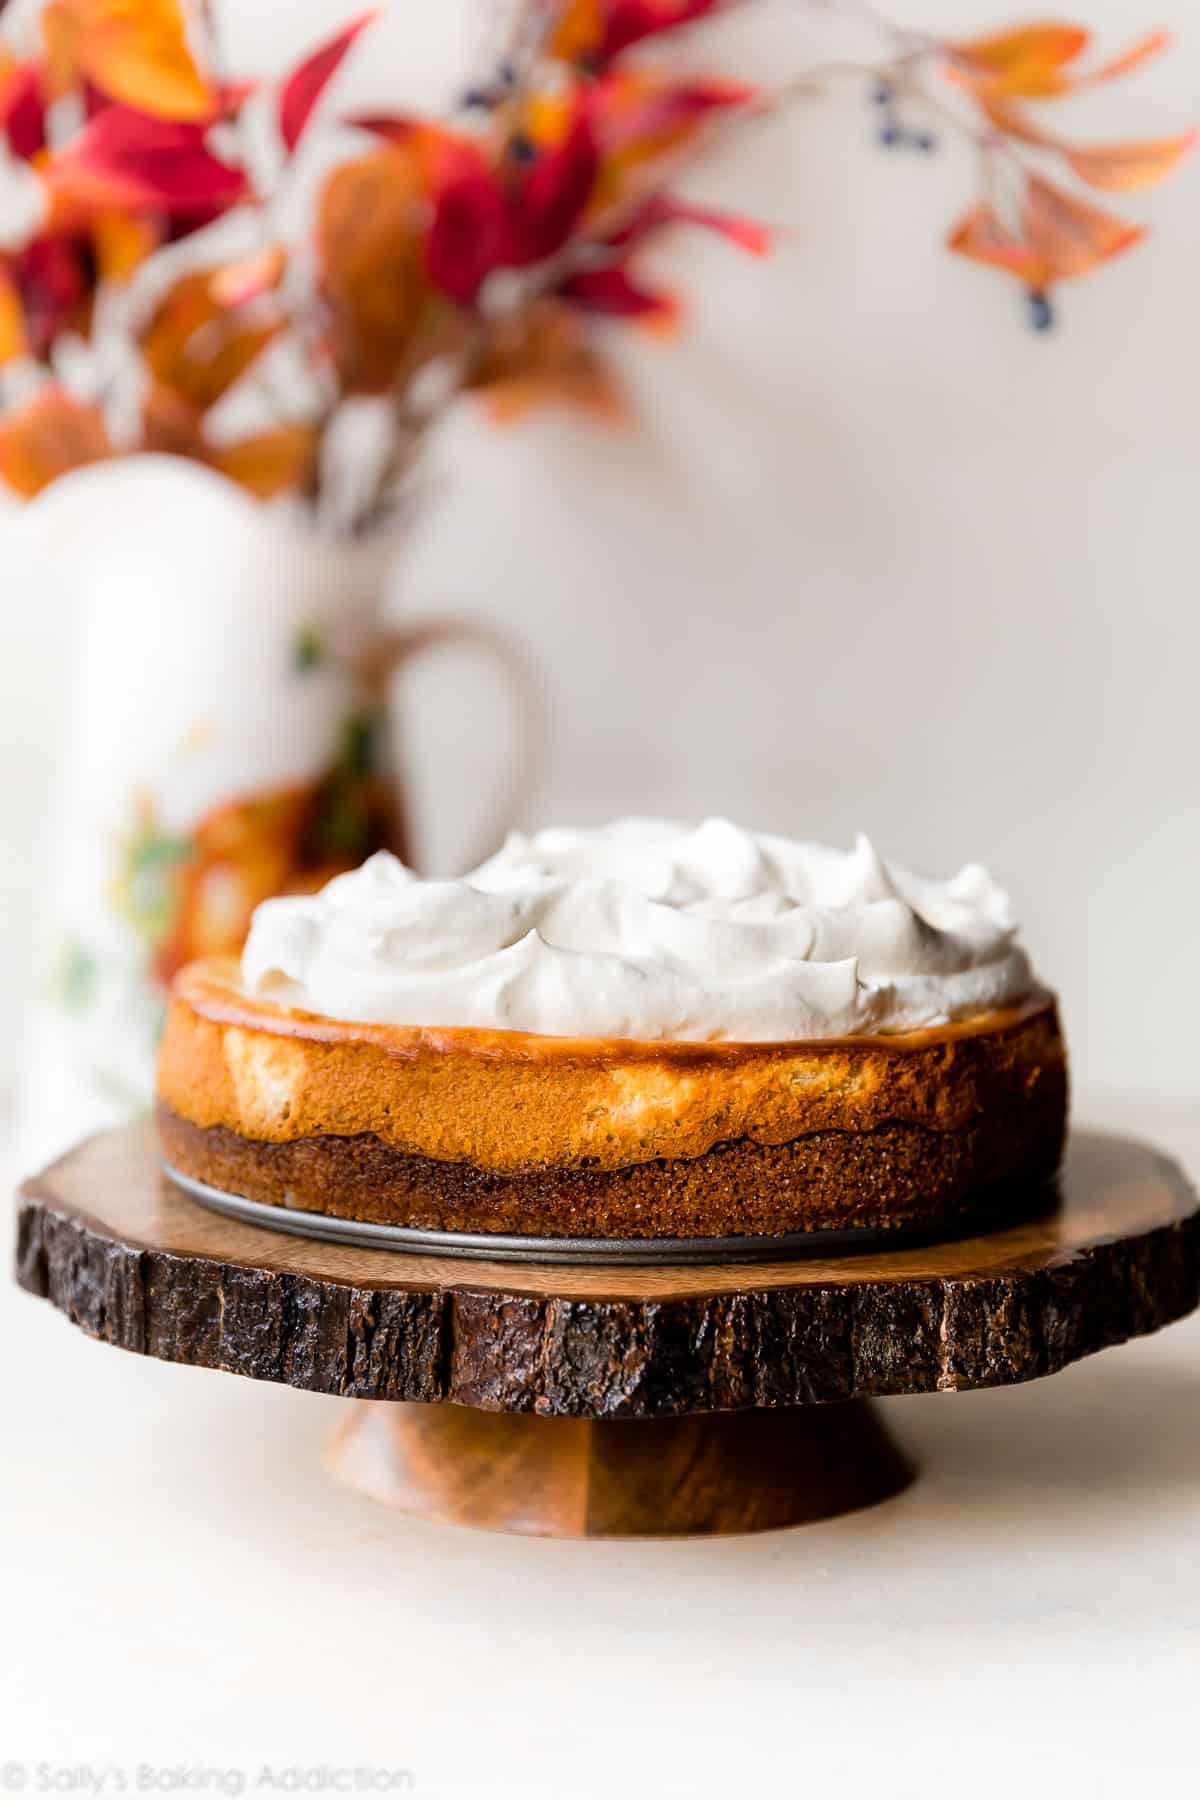
Even when your cheesecake doesn’t crack in any respect, toppings are at all times an exquisite completion to your cheesecake masterpiece. So many pleasant choices!
And if all this appears a bit of overwhelming, strive a no-bake cheesecake or straightforward cheesecake pie as an alternative.
Learn how to Make a Cheesecake Water Bathtub
Prep Time: 10 minutes
Prepare dinner Time: 1 hour
Complete Time: 1 hour, 10 minutes
Yield: 1 cheesecake
Class: Dessert
Technique: Baking
Delicacies: American
Description
Baking your cheesecake in a water bathtub is one of the best ways to make sure cheesecake success. Comply with these instructions utilizing your individual cheesecake recipe. Right here is my traditional cheesecake, should you’d prefer to strive it.
Directions
- Preheat oven as directed in your cheesecake recipe, and regulate an oven rack to the center or lower-middle place.
- Make the Crust: Make with the crust in response to your cheesecake recipe directions and press it into your springform pan. In case your recipe requires pre-baking the crust, bake as directed.
- Wrap the Pan: Tear or reduce two massive items of aluminum foil, and lay one on prime of the opposite. Set the springform pan (watch out if it’s sizzling from the oven!) on prime of the foil, and tightly wrap the foil across the exterior of the pan. This may stop any water from leaking into the cheesecake. *You can even wrap the pan earlier than pre-baking the crust, should you’d like.* Place the wrapped springform pan inside your massive roasting pan.
- Boil Water: Fill a kettle or pot with water and set over excessive warmth to convey the water to a boil. You want 1 inch of sizzling water in your roasting pan for the water bathtub, so be sure you boil sufficient.
- Add the Filling: Pour/unfold your cheesecake batter into the crust as directed in your recipe.
- Place your entire roasting pan with the cheesecake inside it onto the center or lower-middle oven rack. Rigorously pour the boiling-hot water into the roasting pan, in order that the water is about 1 inch deep. Shut the oven door rapidly to entice the steam inside.
- Bake the cheesecake as directed in your recipe.
- Cool & chill the cheesecake: Flip the oven off and open the oven door barely. Let the cheesecake sit within the oven with the water bathtub because it cools down for 1 hour. Take away the cheesecake from the oven and the water bathtub, and set the springform pan on a wire rack to chill fully. As soon as cooled to room temperature, refrigerate the cheesecake as directed in your recipe.
Notes
- Really useful Instruments (affiliate hyperlinks): 9-inch Springform Pan or 10-inch Springform Pan | Heavy Obligation Aluminum Foil | Massive Roasting Pan | Kettle or Electrical Kettle |
- Alternate Water Bathtub Technique: Place the cheesecake (no have to wrap the springform pan in foil) on the middle oven rack of the preheated oven. Place a big roasting pan or steel baking pan (don’t use glass—I often use a 9×13-inch baking pan or an extra-large forged iron skillet) on the underside oven rack. Pour boiling-hot water into the empty pan on the underside rack, about 1 inch deep. Instantly shut oven door to entice the steam inside. This distinctive water bathtub provides steam to the oven with out having the cheesecake sit contained in the water itself.
Key phrases: cheesecake water bathtub